Showing posts with label Party Favors. Show all posts
Monday, April 4, 2011
I Made It Mondays: DIY Cheesecake in a Jar
Good morning my sweeties. How was your weekend? Ours was fabulous! We went bowling, saw a concert, celebrated a birthday, and painted the town red. My brother-in-law was in town so we met up with a few friends. Good times with some good people! Oh yes, I also (finally) joined Twitter. If you haven't started following me, please do so HERE! This stuff is addicting but I love it. It gives me something to read during my downtime.
On Friday, I went on another baking spree and decided to make cheesecake in a jar. Boy was it YUMMY!!! I was hoping to bring some to the birthday party but we ran so late on Saturday after the concert that we didn't have time to go back home to get them. Darn! Next time I guess...but seriously, these came out great. Wouldn't they be perfect wedding party favors? Or better yet, an addition to a wedding dessert bar!
WHAT YOU NEED:
Filling:
- 2 packages of cream cheese
- 1/2 cup sugar
- 2 large eggs
- 8 ounces sour cream
- 1/8 cup flour
- 1 teaspoon vanilla extract
- 1 teaspoon lemon juice
Topping:
- 1 cup flour
- 2/3 cup brown sugar
- 1/4 teaspoon salt
- 4 Tablespoons melted butter
- 1/2 teaspoon cinnamon
INSTRUCTIONS:
1. Make the topping first and set it aside.
2. In another bowl, mix the cream cheese and sugar until fluffy. Slowly add each egg until well incorporated. Add the other ingredients and mix.
3. Spoon into jars. Add the crumb topping.
4. Bake at 325 degrees for 25 minutes. Let cool and refrigerator for at least 4 hours. Add fruit (optional). Bam! Cheesecake in a jar. How easy was that right?
Monday, March 28, 2011
I Made It Mondays: Apple Pie In A Jar
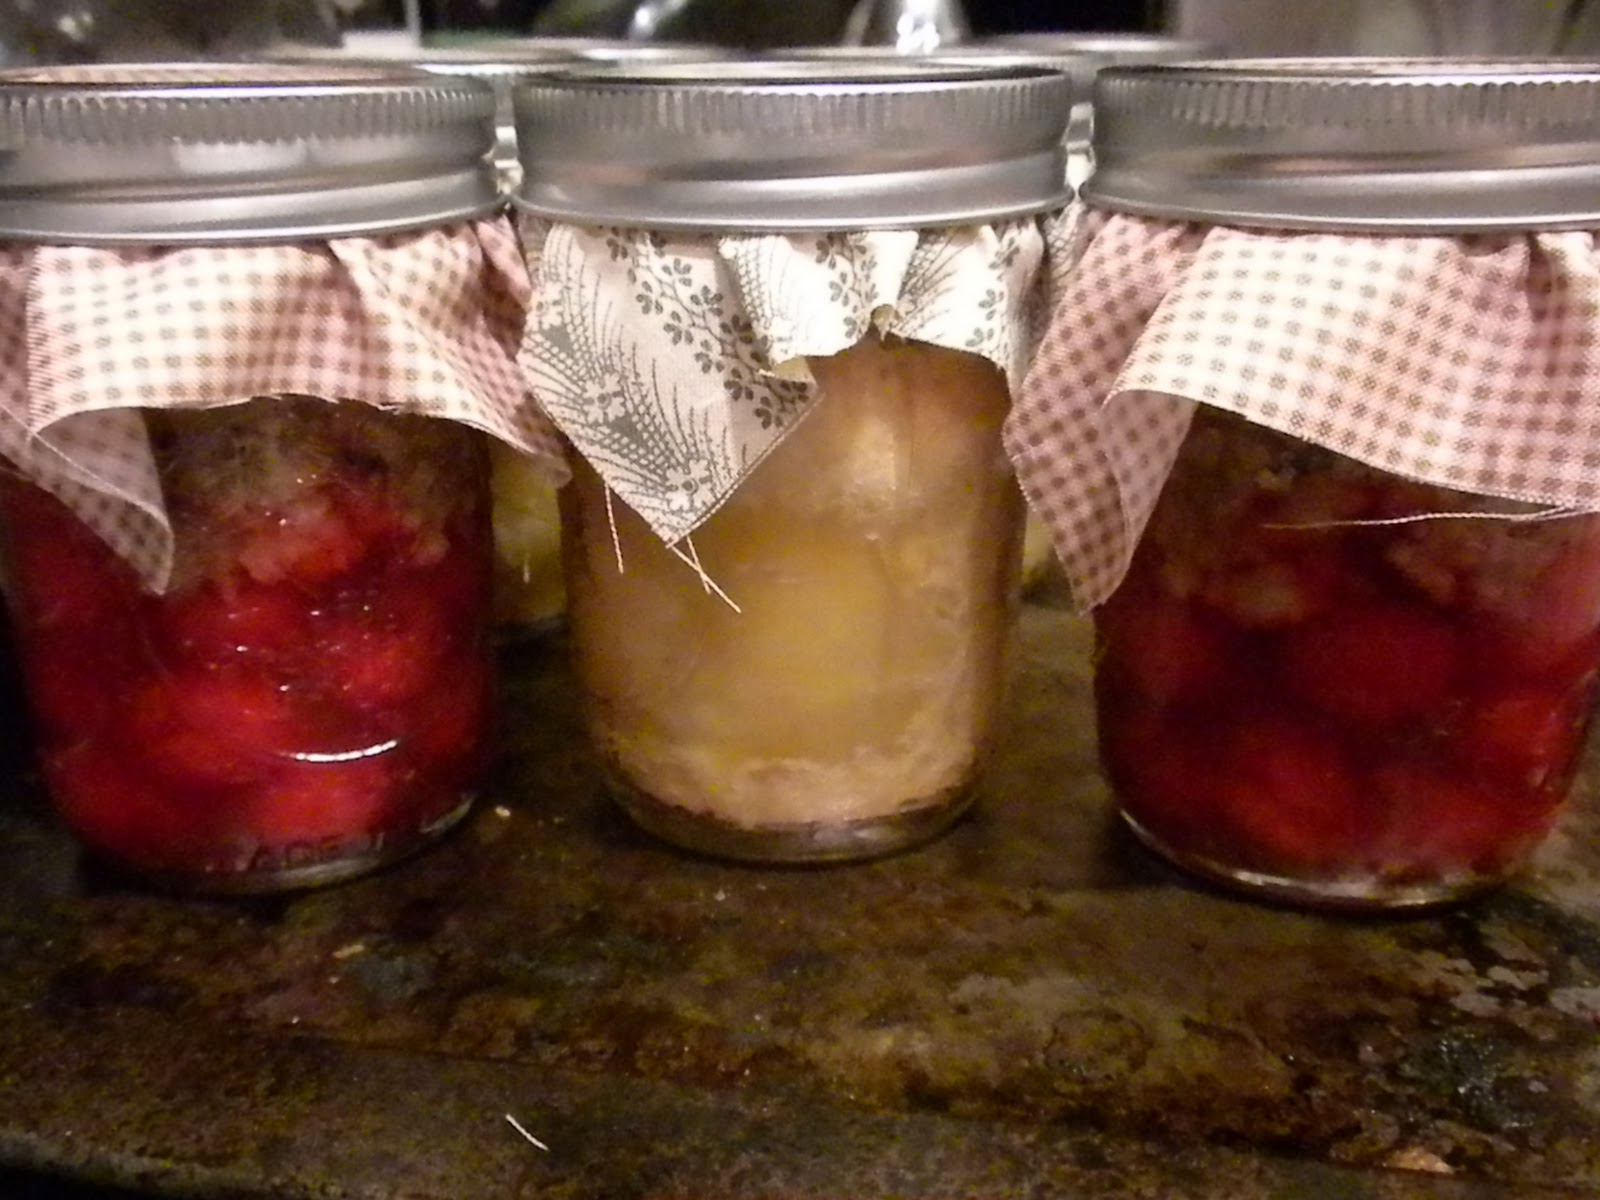
As soon as I got home last Friday, I immediately went to the kitchen and began baking. I've been wanting to do this for a few weeks now but never had the time. I REALLY wanted to make these for our family event last Saturday, but it didn't happen. I did a trial run which turned out great. I wanted to bake more on Saturday, but Sadie came along so I didn't have time...and my husband and I ended up eating 1/2 of what we made. HAHA!
I am so excited to share this with you! My lovelies, this would be THE PERFECT wedding party favor for your guests. A single serving size in a jar! Super creative, incredibly good, and just so darn cute! It came out warm, scrumptious, and super yummy! The Husband definitely loved it and I know your wedding guests will love it too!
(PS - If you are short on time, you can buy the pre-prepared crust and fruit filling and make these.)
WHAT YOU NEED:
- 1/2 pint mason jar (Make sure they are sterilized and cleaned thoroughly)
- Ribbon, Stickers, or Fabric (for decoration)
For dough:
- 2 C Flour
- 11 T Butter (real butter, no exceptions) that’s just over 2/3 C
- 1/4 t Salt
- 4-5 T ice water
For Filling:
- 3 C prepared apples (peeled, diced)
- 3 T sugar
- 2 T flour
- 2 T butter (divided between the pies)
- Seasonings/flavorings- cinnamon, nutmeg, vanilla and almond extract, citrus zest etc)
INSTRUCTIONS:
1. Make the dough and roll it out. Using the lid, press it down on the dough to use for the bottom of the jar. Using the 1/2 pint is a little tricky since it's taller. I used a chopstick it press it down (haha). It doesn't look great, but it works. Just make sure you cover the bottom completely.
2. Cover the sides of the jar 3/4 of the way with dough. It doesn't need to be perfect. Make sure to press firmly and don't miss any holes.
3. Mix all the filling ingredients together in another bowl. Using a spoon, fill each jar a little less than 3/4 of the way. I left a little bit of room.
4. Use the lid again to make the circles and cover the filling in the jar. Press sides firmly with fingers or use a fork. I punched a few holes in each pie to let it breathe.
5. Bake at 375 degrees for about 40 minutes. I put them in a bake dish to prevent them from sliding around. Careful when taking them out. They are HOT and will stay hot for a while.
And...just for kicks...I also made cherry cobbler in a jar at the same time, but that's a secret recipe. Hehe! Here are some pictures:
Thursday, January 27, 2011
Top Pick Thursdays: Elizabeth Anne Designs Real Weddings
I originally planned to only post one entry today but when I came across Elizabeth Anne Designs, I gasped in awe and admiration at THIS real wedding they posted. This beautiful couple got married in Georgia and everything, I mean everything, was perfect. This is my top pick wedding for today. The color selection (peach and champagne), the bride's gown (Vera Wang), and the classic theme makes for a picture perfect wedding. I especially like the picture of the dog at the sign-in table and the fireworks to top the night off. Wow.
![]() | |
| Images via Elizabeth Anne Designs by Laura Negri Photography |
Ceremony Venue – Wesley United Methodist, St. Simon’s Island
Reception Venue – The Cloister at Sea Island
Floral and event design – Sea Island
Stationery and favors – Arzberger
Calligraphy – Yellow House Design
Gown – Vera Wang, purchased from Bergdorf Goodman in NYC
Bridesmaids – Thread, purchased at Bella Bridesmaid
Hair and makeup – Ashley at Bienvenue Salon
Accessories – Gabriela
Shoes – Kate Spade
Catering, bakery, rentals, linens, transportation – Sea Island
Band – Papa Sol
Labels:
Centerpieces,
Flowers,
Gold,
Party Favors,
Reception,
Vera Wang,
Wedding,
Wedding Dress
Monday, January 17, 2011
I Made It Mondays: DIY S'mores Wedding Favors
Happy Monday! Today's DIY Project are delicious easy to make S'mores Wedding Party Favors. I made about 40 of these for our wedding and they were a huge hit! Wish I would have made more, but since I had other wedding favors (like my Hot Cocoa Party Favors) I wanted to give our guests a variety to choose from.
WHAT YOU NEED:
(2) Boxes of Cinnamon Graham Crackers ($3 each) - each box will have about 27 crackers
(2) Bag of Jumbo Marshmallows ($1 each) - I used 2 marshmallows per bag
(1) Jumbo Bag of Mini-Hershey's ($4)
(1) Pack of Twist Ties ($1.99 at Hobby Lobby) - cut in half
(2) Pack of Treat Bags ($1.99 at Hobby Lobby) - each pack contains 25 bags
(2) Rolls of Decorative Ribbon ($1.99 each at Hobby Lobby) - 18ft per roll cut into 10-12inches per ribbon(1) Pack of Notecards ($6.99 at Hobby Lobby) - this if for my tags
Again, Hobby Lobby is always having 50% off sales so keep your eyes peeled! I bought my items for half off!
GRAND TOTAL: $22.19 (after half off prices and tax)...so that means $.55 per favor.
INSTRUCTIONS:
Fill each bag with 1 large cracker, 1 Hershey bar, and 2 marshmallows.
Using a twist tie (remember to cut them in half since they are SUPER long), secure it in place to the plastic bag. PLEASE make sure to secure it very tight to ensure freshness.
Next, using my Notecards, I made my own wedding favor tags and looped it with the pre-cut ribbon.
Secure the tag on the plastic bag and tie the ribbon.
Place in a cute box/container. Bam! S'mores Wedding Party Favors!
Easy to make, delicious to eat, and such a beautiful favor to give your wedding guests.
Tuesday, December 14, 2010
I Made It Mondays: DIY Hot Cocoa Party Favors
My apologies for NOT posting anything yesterday. It was a chaotic day at work and I lost track of time. This past weekend was crazy! We had a full schedule with holiday parties and meeting with our wedding vendors. So, I didn't have time to work on any wedding DIY projects, but this one is I will definitely do. Since our wedding is in the winter, we wanted to make something warm for our guests to take home. I found this great idea on Wedding Bee.
What You Need: (to make 150 cones)
- (3) 100, 12" Disposable Decorating Bags (bought these from Michaels using their 40 and 60% off coupons - regularly $19.99)
- (2) Nesquick chocolate powder (we got ours from Costco for around $6)
- (2) 75 teeny, tiny hair ties ($5)
- (4) Marshmallows (from Walmart, $1 each)
- yarn (Michaels for $2.50)
- favor tags
Total spent: (around) $56. We made 150, so they came out to around $.37 each!
Step 1: Cut decorating bags around 6.5"
Step 2: Fill bag with 2 tablespoons (or whatever your chocolate powder suggests) with chocolate:
Step 3: Use the teeny, tiny hair tie to close off the chocolate. (You may need to cut the access bag after tying it off. The picture below, for example, should be cut so there's just about a 1/2 inch of bag showing after the hair tie.)
Step 4: Insert chocolate filled cone into another decorating bag; make sure seams line up.
Step 5: Scoop out a 1/4 cup of marshmallows and poor into decorating bag on top of the chocolate cone.
Step 6: Tie a piece of ribbon, yarn, or string above the marshmallows. You need to make this tight so the marshmallows don't dry out. I tied it into two knots:
Step 7: After string is secure around bag, add your favor tag and tie it into a pretty bow
Step 8: Repeat as many times as necessary
Posting and Images via Wedding Bee
Subscribe to:
Posts (Atom)