Showing posts with label DIY. Show all posts

Friday, July 22, 2011

Got Ten Minutes for a New Updo??

 T.G.I.F. my darlings! How's your day going so far? I've been slacking a little with the blogging this week so I wanted to make it up to you!  You're in for a REAL treat with this amazing video I found on YouTube.

If you're anything like me, then you can relate when it comes to managing your hair. It's a love/hate relationship. I love the look of long hair, but it's such a pain to style (especially with this weather)! I am NOTORIOUS for washing my hair and putting it up so I sought out to find some easy and pretty hairstyles and updos that I can do with my hair wet! Yay!!!

I found this ONE video that shows you 
how to fix your wet hair FIVE different ways in TEN minutes or less! 

I have tried 3 of the styles and it really works!  This is such a HUGE lifesaver for me and the BEST part is most of these tutorials incorporate braids into them and you know how HOT that trend is right now.

Enjoy my lovelies and PLEASE let me know if you try any of these looks. 
This girl is seriously amazing.

Wednesday, July 13, 2011

Wedding Wednesdays: The Perfect Backdrop

How perfect and beautiful would it be to walk down the aisle and exchange vows in front of one of these beauties?  LOVING and SWOONING over these wonderful wedding backdrops.

THE BEST DIY CHANDELIER EVER!

BLHDN WOWS YET AGAIN...

A BACKYARD VINTAGE INSPIRED LOOK

WHO NEEDS AN EXTRAVAGANT ONE WHEN THE OCEAN IS YOUR BACKDROP?


LOVE ALL THE COLORS!


MY FAVORITE ONE OF ALL
via

Wednesday, July 6, 2011

Wedding Wednesday: Fun Guest Book Ideas

Happy Wednesday dolls! Loving my Wedding Wednesdays segment today.  I LOVE going to weddings that have personal touches and unique ideas especially when it involves a fun sign-in station.  Instead of letting your guest book collect dust in the attic, how fun would it be to DISPLAY your wedding guest book in your home one day?  LOVE LOVE LOVE these cute ideas I found on Etsy.  Here are a few of my FAVORITES!

Move Over Family Tree, Make Way For Balloon Prints!
Silhouette Weddings
Bleu De Toi

Message In a Bottle
Gracefully Southern

Make a Poster Out Of It
Personalized Prints

Friday, July 1, 2011

Guest Post at {Eat, Love, & Style} and A Braided Hair Tutorial

My LOVELIES! Happy Friday!!!  Today's post is short and sweet.  I am guesting blogging over at Jackie's LOVELY blog Eat, Love & Style while she's on vacation.  What a lovely lady!  Head over there for the 'Oh, So Lovely' segment.

Since I have the day off, I've been browsing the web for the some great weekend updos and absolutely LOVE this one I found on Cupcakes and Cashmere. Last week, I was craving the top knot bun, but this weekend will be all about the braid.  Isn't this wonderful?  It looks a lot harder than it appears, but that's the beauty of it!  Two braids, a little loop, a few pins here and there, and voila!  A SUPER cute look.  I need to practice this hair tutorial and perfect my look for our 4th of July festivities! Have a FABULOUS day dolls!!!

via

Friday, June 24, 2011

Fashion Fridays: Top Knot Hair Tutorial


Hi dolls! TGIF!!!  So the weekend is here and I know you've already picked out your cutest outfits for Girls Night Out or an evening date with that special someone, but what about your hair?  On one hand, the weekend is the ONLY time I get to play dress up, but then again, it's also when I'm at my laziest.

SO, with that being said, you can probably see me sporting my "bun bun" look. Luckily, I have a WONDERFUL tutorial for the top knot bun I found on Vogue that is so POPULAR right now.  Wear this to work, out on the town, or to the park for a picnic.  Anything low maintenance gets EXTRA kudos in my book! Enjoy lovelies!

THE FINAL LOOK

1. Apply mousse and blowdry.
2. Tie in a high ponytail.
3. Tease, tease, and tease some more.
4. Divide in 2 sections.
5. Tie in a knot.
6. The bulk of the bun goes in the front and the loose ends goes in the back. Secure with bobby pins and hairspray.
{Images via Pinterest}

Wednesday, May 25, 2011

Wedding Wednesdays: DIY Cupcake Toppers

Gosh - it's been a while since I've posted any DIY wedding projects, but when I saw this one from The Sweetest Occasion, I laughed...and then I kicked myself in the butt for not thinking of it first!

How cute and funny would it be to have these GREAT cupcake toppers at your wedding or any social gathering?  Instead of the usual mushy sayings, this one gives it to you straight. No lines. No games. Just straight talk. And I LOVE it. I LOVE IT SO MUCH...Click HERE for the full tutorial. Enjoy lovelies!


{Images by Lovely Indeed via The Sweetest Occasion}

Wednesday, May 18, 2011

Wedding Wednesdays: Like A Fat Kid Loves (Homemade) Cake

Morning dolls! How's your Hump Day moving along? Wonderfully I hope! SO loving today's post.  There's NOTHING I love more than going to a beautiful wedding filled with personal touches and lovely DIY projects.  One of the things I look forward to most is..you guessed it - THE CAKE!!!  I LOVE sweets and no matter how full I am, I always make room for wedding cake.  Frankly, I usually end up eating my hubby's portion or I ask for a big slice.  I know - I have no shame. What? A gal's gotta eat.

I don't think there's anything better than getting a slice of cake made straight from the heart with extra love sprinkles.  TOTALLY loving these delicious homemade weddings cakes below. Can you say YUM?


{Images via The Lane}

Wednesday, April 13, 2011

Wedding Wednesdays: A Rockin' Wedding

Wow. How refreshing is it to see a completely different wedding theme?  I stopped dead in my tracks after I saw this wedding shoot and fell in love with it.  It's edgy, totally out there, and it all works. The theme revolved around a lot of feathers, which is clearly evident in the DIY chandelier, placements, stationery, and did you notice her wings??? Wowzers.


{Images via The Sweetest Occasion by Courtney Lindberg Photography.}

Wedding Wednesdays: DIY Pompom Accessory

Hey lovelies.  How's your day going?  It's been a pretty busy week at work and I am glad the week is almost over. Woowhoo!  I love Wedding Wednesdays because I get to reminisce about my wedding a few months ago AND I get to browse other beautiful weddings. Since I didn't get to post a DIY project this week, I had to show you this.  I would have LOVED to have done this for my bridesmaids.  Even if you aren't getting married, this would be a great accessory for your hair or outfit.


WHAT YOU NEED:
- Fabric scraps
- Thread
- Cardboard scraps
- Scissors
- Glue gun
- Whichever type backing you prefer (bobby pins, pin backs, clips, etc.)

Click HERE for the full tutorial by Lovely Indeed.

{Image via The Sweetest Occasion by Lovely Indeed}

Tuesday, April 5, 2011

Trendy Tuesdays: The Trench Coat (DIY)


Good morning my beauties!  Today has been such a wonderful day and it just started.  The air is crisp and cool in Houston and I had to pull out my coat for work today.  I LOVE trench coats and what to you know? Honestly...wtf sent me a super cool DIY project on how to make a sleeveless trench coat.  Trendy, innovative, and super cute!  I will totally be doing this!  Click HERE for the full tutorial.  Enjoy!


{Images via Honestly...wtf}

Monday, April 4, 2011

I Made It Mondays: DIY Easter Egg Garland

Easter is less than 3 weeks away and this is just the most darling decor idea ever!  Raid your nearest Home Depot or Lowe's for the paint chips.  Fun, simple, and practically free!  I love free things - don't you? Here is the full tutorial on Modern Parents Messy Kids.  Just think - what if you made these garlands for your wedding decor?? Heck yes!

{source}

I Made It Mondays: DIY Cheesecake in a Jar


Good morning my sweeties. How was your weekend? Ours was fabulous!  We went bowling, saw a concert, celebrated a birthday, and painted the town red.  My brother-in-law was in town so we met up with a few friends. Good times with some good people!  Oh yes, I also (finally) joined Twitter.  If you haven't started following me, please do so HERE!  This stuff is addicting but I love it. It gives me something to read during my downtime.

On Friday, I went on another baking spree and decided to make cheesecake in a jar.  Boy was it YUMMY!!!  I was hoping to bring some to the birthday party but we ran so late on Saturday after the concert that we didn't have time to go back home to get them. Darn!  Next time I guess...but seriously, these came out great.  Wouldn't they be perfect wedding party favors? Or better yet, an addition to a wedding dessert bar!

WHAT YOU NEED:
Filling:
- 2 packages of cream cheese
- 1/2 cup sugar
- 2 large eggs
- 8 ounces sour cream
- 1/8 cup flour
- 1 teaspoon vanilla extract
- 1 teaspoon lemon juice

Topping:
- 1 cup flour
- 2/3 cup brown sugar
- 1/4 teaspoon salt
- 4 Tablespoons melted butter
- 1/2 teaspoon cinnamon

INSTRUCTIONS:
1.  Make the topping first and set it aside.

2. In another bowl, mix the cream cheese and sugar until fluffy. Slowly add each egg until well incorporated.  Add the other ingredients and mix.

3. Spoon into jars. Add the crumb topping.

4. Bake at 325 degrees for 25 minutes. Let cool and refrigerator for at least 4 hours. Add fruit (optional). Bam!  Cheesecake in a jar.  How easy was that right?


Tuesday, March 29, 2011

Trendy Tuesdays: DIY Box Braid Necklace

Hello my lovely blogsters! I can't tell you how infatuated I am with Honestly...wtf.  No, really...wtf?!?!  This blog is bold, trendy, and just A-W-E-S-O-M-E!  My posting for today is not only trendy but also a great DIY project! Double yay!

She saw this necklace from Phillip Lim‘s Box Braid Collar Necklace which is absolutely great, but a whopping $225...


and turned it into this! 

She made her very own for probably like $5 or $10! All you need is yard (preferably micro-fiber faux suede), rubber bands, and an assorted size of washers. That's it! That deserves a "wtf" for what the fabulous!! Wow. I heart her! Click HERE for the full instructions. I can't wait to try this.  Enjoy my friends!

{Images via Honestly...wtf}

Monday, March 28, 2011

I Made It Mondays: Apple Pie In A Jar


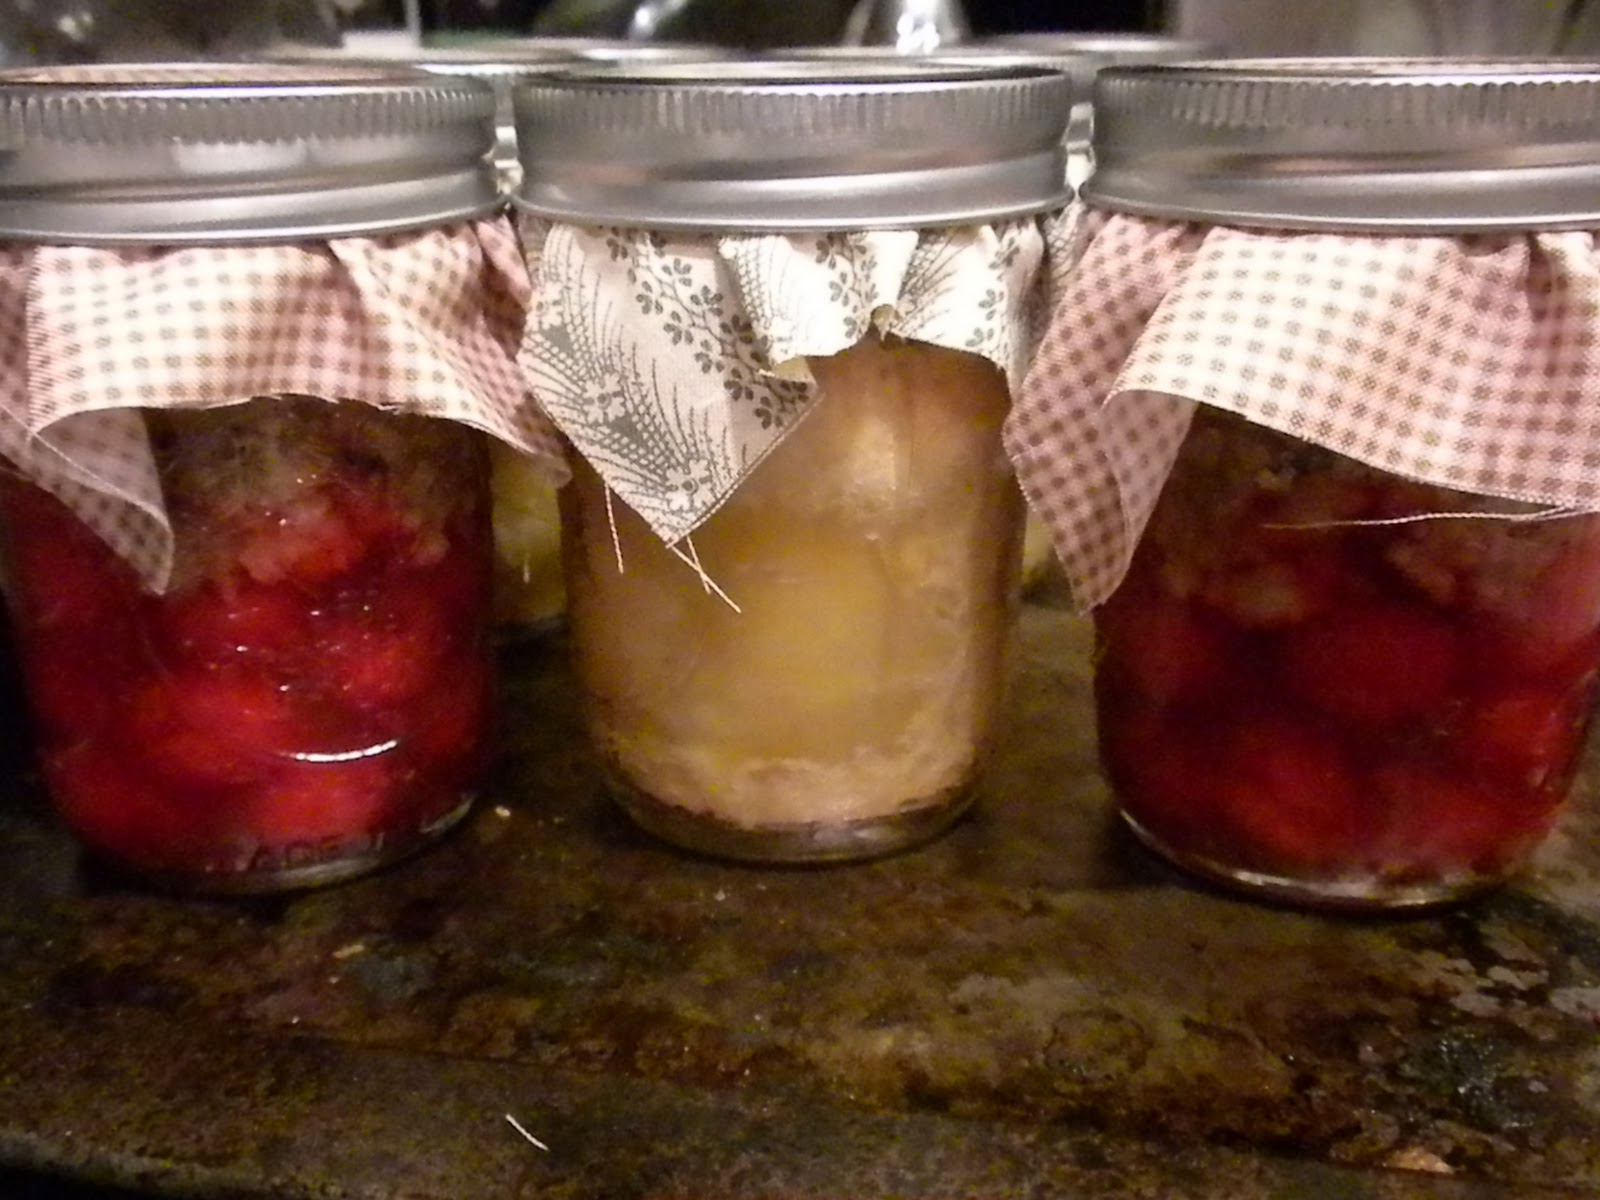
As soon as I got home last Friday, I immediately went to the kitchen and began baking. I've been wanting to do this for a few weeks now but never had the time. I REALLY wanted to make these for our family event last Saturday, but it didn't happen.  I did a trial run which turned out great.  I wanted to bake more on Saturday, but Sadie came along so I didn't have time...and my husband and I ended up eating 1/2 of what we made. HAHA! 

I am so excited to share this with you!  My lovelies, this would be THE PERFECT wedding party favor for your guests.  A single serving size in a jar!  Super creative, incredibly good, and just so darn cute! It came out warm, scrumptious, and super yummy! The Husband definitely loved it and I know your wedding guests will love it too!

(PS - If you are short on time, you can buy the pre-prepared crust and fruit filling and make these.)

WHAT YOU NEED:
- 1/2 pint mason jar (Make sure they are sterilized and cleaned thoroughly)
- Ribbon, Stickers, or Fabric (for decoration)
For dough:
- 2 C Flour
- 11 T Butter (real butter, no exceptions) that’s just over 2/3 C
- 1/4 t Salt
- 4-5 T ice water
For Filling:
- 3 C prepared apples (peeled, diced)
- 3 T sugar
- 2 T flour
- 2 T butter (divided between the pies)
- Seasonings/flavorings- cinnamon, nutmeg, vanilla and almond extract, citrus zest etc)

INSTRUCTIONS:
1.  Make the dough and roll it out. Using the lid, press it down on the dough to use for the bottom of the jar. Using the 1/2 pint is a little tricky since it's taller.  I used a chopstick it press it down (haha).  It doesn't look great, but it works. Just make sure you cover the bottom completely.

2.  Cover the sides of the jar 3/4 of the way with dough.  It doesn't need to be perfect.  Make sure to press firmly and don't miss any holes.

3.  Mix all the filling ingredients together in another bowl.  Using a spoon, fill each jar a little less than 3/4 of the way.  I left a little bit of room.

4. Use the lid again to make the circles and cover the filling in the jar.  Press sides firmly with fingers or use a fork.  I punched a few holes in each pie to let it breathe.

5. Bake at 375 degrees for about 40 minutes. I put them in a bake dish to prevent them from sliding around. Careful when taking them out.  They are HOT and will stay hot for a while. 

6. Decorate as you please.  Bam! Apple pie (and cherry cobbler) in a jar.

And...just for kicks...I also made cherry cobbler in a jar at the same time, but that's a secret recipe. Hehe! Here are some pictures: